 Merken
 My sister called me three days before her spring birthday asking if I could bake something that felt like sunshine in cake form. She'd been describing this bright, lemony dream she'd had, and somehow I knew exactly what she meant. That afternoon, I started pulling together this sheet cake—the kind that's tender enough to slice cleanly but bold enough to make everyone at the table pause mid-conversation. The homemade lemon curd filling became my obsession; I must have made it four times before I understood the magic was in the patience, not the speed.
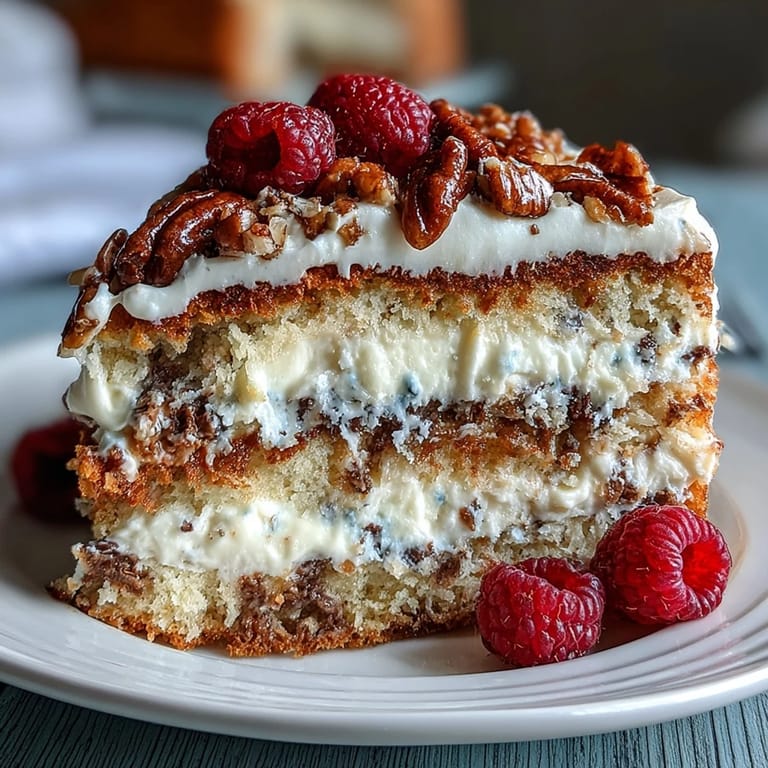
I'll never forget my sister's face when she saw that cake on her table, topped with fresh berries and a dusting of lemon zest. She took one bite and got this quiet, thoughtful expression—the kind that means a dessert has hit exactly right. Later that evening, three different people asked me for the recipe, and I realized this wasn't just a cake; it had become the thing everyone would remember about that day.
Ingredients
- All-purpose flour (2 ½ cups): This is your structure, so don't skip the measuring or pack it down; spoon it gently and level with a knife.
- Baking powder and baking soda (2 ½ tsp and ½ tsp): They work together to give you that tender crumb without making the cake taste metallic.
- Salt (½ tsp): A tiny pinch that wakes up the lemon flavor and rounds out the sweetness.
- Unsalted butter and granulated sugar (1 cup and 2 cups): Creaming these together creates the foundation for a light, fluffy texture; don't rush this step.
- Room temperature eggs (4 large): Cold eggs won't incorporate smoothly, and you'll end up with a denser crumb than you want.
- Vanilla extract (1 tbsp): A full tablespoon gives you depth without making the cake taste artificial.
- Whole milk (1 cup): Keep it at room temperature so it doesn't shock the batter when you add it.
- Lemon zest (1 zest from 1 lemon in cake, 2 lemons for curd): Zest before you juice; it's impossible to go back.
- Egg yolks (4 large for curd): These create that silky, custard-like filling that's absolutely essential.
- Fresh lemon juice (⅓ cup): Bottled juice will make your curd taste flat, so squeeze fresh lemons every time.
- Heavy cream (2 cups, chilled): The cold matters; warm cream won't whip to those perfect stiff peaks.
- Powdered sugar (½ cup): This dissolves faster than granulated sugar in the cream.
Tired of Takeout? 🥡
Get 10 meals you can make faster than delivery arrives. Seriously.
One email. No spam. Unsubscribe anytime.
Instructions
- Heat your oven and prepare the pan:
- Set the oven to 350°F and line your 9x13-inch sheet pan with parchment paper, making sure it comes up slightly on the sides. This keeps your edges from browning too quickly and makes removal effortless.
- Combine your dry ingredients:
- In a medium bowl, whisk together the flour, baking powder, baking soda, and salt until everything feels evenly distributed. This prevents lumps and ensures the leavening agents spread throughout the batter.
- Cream the butter and sugar until pale:
- Use an electric mixer on medium speed for about 3-4 minutes; you'll notice the mixture go from grainy to fluffy and pale yellow, which means you've incorporated enough air for a tender cake. Stop and scrape down the bowl halfway through.
- Add the eggs one at a time:
- After each addition, beat for about 30 seconds until the egg is fully combined and the mixture looks smooth. This is where patience pays off; rushing creates a curdled-looking batter that won't bake evenly.
- Mix in the vanilla and lemon zest:
- Stir these in gently, just until you see the zest scattered throughout. The fragrance at this moment is a small reward for all your work.
- Alternate the dry mixture and milk:
- Add a third of the dry ingredients, mix briefly, then half the milk, mix briefly, then another third of the dry, all the milk, and finally the last of the flour. This method prevents overmixing, which toughens the crumb.
- Pour and bake:
- Spread the batter evenly into your prepared pan and smooth the top with a spatula. Bake for 28-32 minutes until a toothpick inserted in the center comes out clean or with just a few moist crumbs.
- Cool the cake thoroughly:
- Let it sit in the pan on a cooling rack for at least 30 minutes before attempting to remove it; patience here prevents breakage and crumbs.
- Make the lemon curd while the cake cools:
- In a small saucepan, whisk together the egg yolks, sugar, lemon juice, and zest over medium-low heat, stirring constantly for about 5-7 minutes. The mixture will go from loose to thick and custard-like; watch for it to coat the back of a spoon.
- Finish the curd with butter:
- Remove from heat and whisk in the cubed butter until it's completely smooth and glossy. Press plastic wrap directly onto the surface of the curd and refrigerate until cold.
- Whip the cream for frosting:
- Using chilled beaters and a chilled bowl, beat the cold heavy cream with powdered sugar and vanilla on medium-high speed until stiff peaks form. Don't overbeat or you'll end up with butter.
- Slice the cake horizontally:
- Using a serrated bread knife, carefully slice the cooled cake in half horizontally, creating two even layers. A gentle sawing motion works better than pressing down hard.
- Assemble with lemon curd:
- Remove the top layer, spread the chilled lemon curd evenly over the bottom layer, then carefully replace the top. The curd should be cold enough to support the top layer without squishing out.
- Frost and decorate:
- Spread the whipped cream frosting evenly over the top and sides of the cake using an offset spatula. Add fresh berries, edible flowers, or lemon zest curls just before serving.
- Chill before serving:
- Refrigerate the assembled cake for at least 1 hour; this helps the layers set and makes slicing clean and beautiful.
 Merken
 There's something about watching someone close their eyes on the first bite of a homemade cake that reminds you why you bake in the first place. This one in particular has that magic quality where it feels special and celebratory but tastes like home.
Making Perfect Lemon Curd
I learned the hard way that lemon curd is less about cooking and more about gentle coaxing. The first time I rushed the heat, I ended up with scrambled eggs instead of silky custard. Now I set my timer for seven minutes and refuse to multitask while it's on the stove. Keep your heat at medium-low; if the mixture starts steaming aggressively, you're going too hot. The magic happens when you see it thicken just enough to coat a spoon but before it breaks.
Sheet Cake Advantages
I used to think sheet cakes were somehow less elegant than layer cakes, until I realized they're actually the opposite. They're easier to transport, harder to damage, and they feed more people without requiring architectural skills. This particular cake stays moist longer because the filling and frosting protect the crumb from drying out, which means it tastes even better on day two than it did fresh from the oven.
Variations and Personal Touches
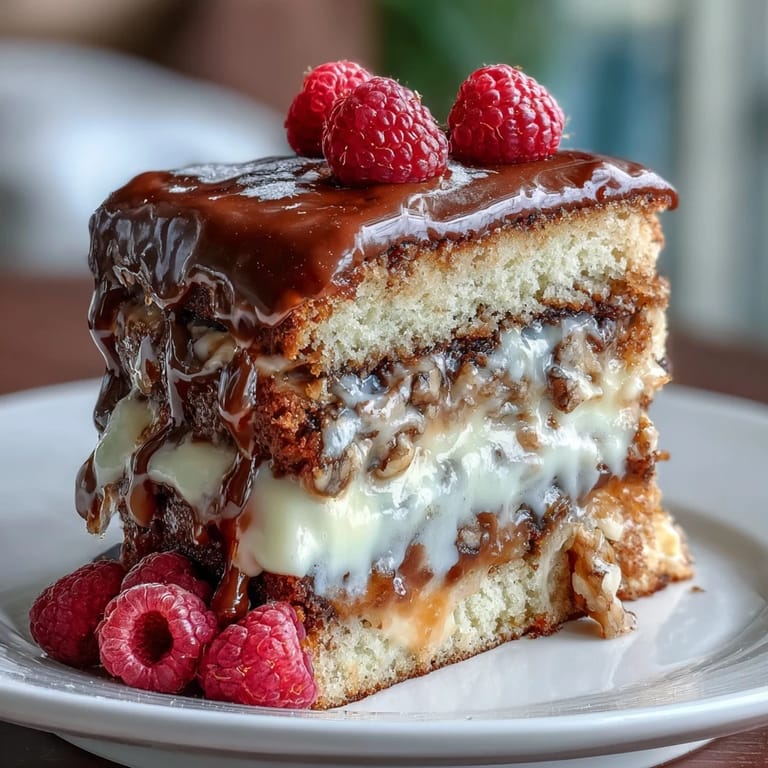
Once you understand this recipe, you can play with it endlessly. I've made it with raspberry curd instead of lemon, topped it with crushed pistachios, and even brushed the layers with a simple lemon syrup before assembly for extra moisture and flavor. The structure is forgiving enough to handle your creativity without falling apart. Some people press fresh edible flowers into the whipped cream; others do a simple dusting of powdered sugar for a more understated look.
- For extra brightness, brush each cake layer with lemon juice mixed with a little sugar before adding the curd.
- If you prefer less tang, reduce the lemon juice to ¼ cup and add more butter to the curd.
- Make this cake up to a day ahead, wrap it well, and refrigerate; it actually improves as the flavors meld together.
 Merken
 This cake has become my go-to whenever I want to make someone feel celebrated without spending the entire day in the kitchen. It's the kind of recipe that becomes a tradition once people taste it.
Häufige Fragen zum Rezept
- → Wie verhindere ich, dass der Kuchen trocken wird?
Indem Sie die Backzeit genau einhalten und den Kuchen nach dem Backen vollständig abkühlen lassen, bleibt der Teig saftig und zart.
- → Kann ich die Zitronencreme im Voraus zubereiten?
Ja, die Zitronencreme lässt sich gut im Kühlschrank lagern und kann vor der Verwendung gekühlt werden, um eine feste Konsistenz zu erhalten.
- → Welcher Schlagrahm eignet sich am besten für das Topping?
Frische, gut gekühlte Schlagsahne mit einem Fettgehalt von mindestens 30 % sorgt für ein stabiles und cremiges Topping.
- → Wie dekoriere ich den Kuchen am besten?
Frische Beeren, essbare Blüten oder Zitronenzesten verleihen einem Frühlingsthema entsprechend eine frische und ansprechende Optik.
- → Kann man den Kuchen glutenfrei zubereiten?
Ja, indem Sie das Mehl durch eine glutenfreie Alternative ersetzen und auf geeignete Backtriebmittel achten, ist eine glutenfreie Variante möglich.